How to install Chef servers:
Install VMWare Workstation on your system.
I have installed two Virtual Machine on VMWare Station [Xbuntu-chef-admin and ubuntu-chef-server]
I have setup network connection on NAT connection in order to communicate with each other [ssh connection]
ssh to another server:
sudo ssh ubuntu-chef-server@192.168.93.129 [From xubuntu-chef-admin [192.168.93.130]]
To download chef-server copy:
sudo wget https://packages.chef.io/stable/ubuntu/16.04/chef-server-core_12.9.1-1_amd64.deb
To install chef-server:
sudo dpkg -i chef-server-core_12.9.1-1_amd64.deb
To configure chef-server:
sudo chef-server-ctl reconfigure
To upgrade chef server:
sudo chef-server-ctl upgrade
To start chef server:
sudo chef-server-ctl start
To remove configuration files, logs,directories, users, etc.
sudo chef-server-ctl cleanup
To see chef-server webpage
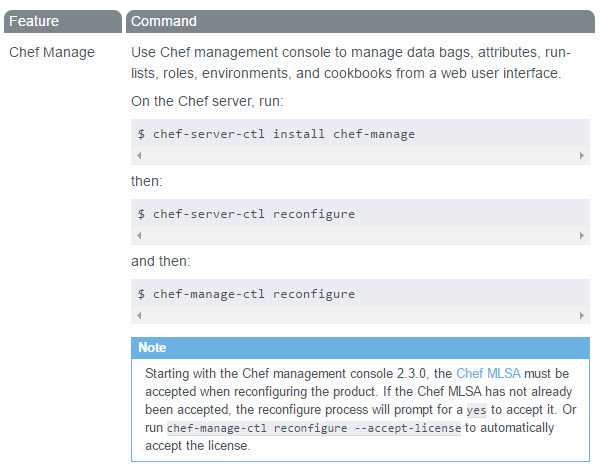
https://192.168.93.129/ [it was not resolving DNS so had to use IP instead of name also I had to install managemnet console using sudo hef-server-ctl install chef-manage or it can be download from https://downloads.chef.io/chef-manage/ubuntu/]
To Install Chef Management Console
Turn the firewall on and off
sudo ufw enable /disable
I was not able to get https://chef-server web log in page on my xubuntu-chef-admin page, [it was NOT resolving DNS] in order to resolve that I had to change host file on xubuntu-chef-admin server using this command
sudo nano /etc/hosts
and then i have entered manual entry as below
192.168.93.129 https://ubuntu-chef-server
and after that i have got this page:
To Create an Admin account on chef server:
chef-server-ctl user-create [USERNAME] [FIRSTNAME] [LASTNAME] [EMAIL ADDRESS] ['PASSWORD']' --filename [FILENAME].pem
sudo chef-server-ctl user-create admin Chef Administrator snehalpatel2112@gmail.com '$erver00' --filename admin.pem
To Install Addons:
sudo chef-server-ctl install chef-manage
To copy one file from server 1 to server 2:
sudo scp chef-starter.zip ubuntu-chef-server@192.168.93.129:./Chef
sudo apt-get install curl [This will install curl program and after that run below command]
curl -L https://www.opscode.com/chef/install.sh | sudo bash
To Install Git-hub
sudo apt-get install git
To Install Chef-repo from git site:
git clone https://github.com/opscode/chef-repo.git
which will download all latest chef-repo from git and put it on your pwd [current dir]
after that get in that folder [cd chef repo] and create another hidden folder using mkdir . chef,
to see hidden folder just run [ls -a] command make sure .chef folder is there.
Now we have generate two keys [validator and user keys] in order to make sure chef-admin and chef-server will talk to each other
In order to get private key we have to do reset key from admin panel from chef server UI.
vim admin.pm command [you might have to install vim package before running this command] and paste it there to make sure run cat admin.pem and make sure whatever you paste in that file is showing on the screen.
Now you have to get one more key which is web-validator key,In order to get the web-validator key you need to go to on Policy tab on console and then click on Clients and create a new client if you don't have one.
Once you have created that file you need to copy private key to new file, In order to do that you have to create a new file using vim command and save it in .pem file same as we did for admin.pim but this time you need to save it under chef-validator.pem
Once you do that you will have two .pem file at pwd. if you see both files awesome you can go for a party
After that we have to user knife program, So first we have to initialize knife, to do that I am going to get ouf from .Chef folder and will be working on chef-repo folder.
* By mistake I had give different name [knife.rb**] instead of knife.rb only so I had rename the file using GUI.
knife user list [ to conformed if admin workstation is communicating with server ]
Video 7 Version control for Chef Repo using Git [Run git on Chef-Repo directory]
git commit -a -m "Message about commit" [-a = all, -m= message]
git log [it will give logs to all commits]
git add . [. = Current directory]
git status
git checkout -- file/name/desired [Restore the last committed file]
Video 8 Define Our scenario & Bootstrap a Node


No comments:
Post a Comment